|
|

Growing compact standard trees allows you to tuck more varieties of fruit into corners of your property or a small orchard, and means you can choose those varieties by flavor and climate adaptability rather than by tree size. Nearly any standard and semi-dwarf tree — from pears, peaches and plums to apples and apricots — can be trained to stay much more compact and be dwarf. Timed pruning is an awesome pruning method for growing an orchard in a small backyard - create an appreciably smaller fruit tree — as small as most dwarf trees. Espaliered trees is also an option, and that method is very ornamental and pretty easy. Check it out here. How To Dwarf Your Trees With Timed Pruning Dwarf it in a pot, or dwarf it in the ground. The concept's the same. The only difference is that you're saving a lot of space by growing fruit trees in pots. You also don't have to concern yourself with soil diseases or competition from your other trees for the nutrients. This procedure is meant for dwarfing standard size fruit trees. Nearly any deciduous fruit variety can be trained to stay compact. If you're not going to purchase bare root dwarf trees, you can dwarf full- size varieties yourself. I personally prefer to buy dwarf fruit trees, put them in pretty pots, and keep them diligently pruned to keep them small, full and productive. If i'm going to want dwarf trees, that's what I'd get in the first place. But this is a great method if you see that you're going to run out of space and already planted a standard fruit tree sapling in the ground. These instructions are for dwarfing normal-sized fruit trees with timed pruning. Fruit trees’ reaction to pruning is dependent on the season in which the cuts are made. The trees’ response to the pruning is determined by whether the tree is actively growing (spring), gathering nutrients (early summer), preparing for dormancy (late summer), or fully dormant (fall and winter).
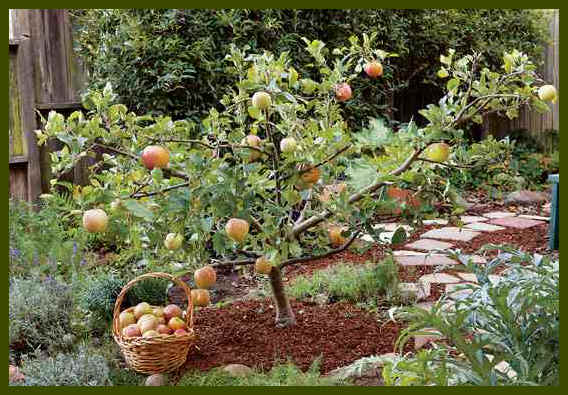
After fruit was thinned to 8 inches apart, this
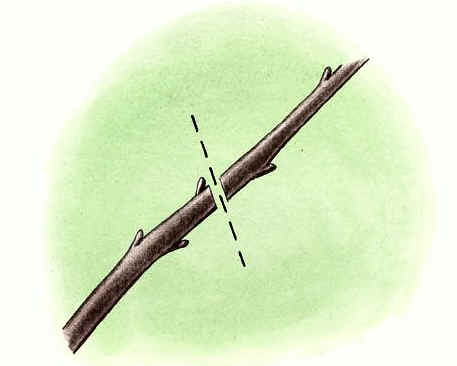
5-year-old tree still produced 84 large apples. Crowd Planting Standard fruit trees As winter ends, and the ground is workable for planting, buy a dormant bareroot fruit tree. Plant the tree as soon as possible. As soon as you can dig a hole. If using big portable pots, skip that whole digging thing. With "high-density planting" in-ground, several of the same type of fruit tree with a similar rootstock—such as a grouping of early, midseason, and late peaches—are planted in a single hole, spaced 18 inches apart on center. In all cases, pruning and competition for water and food limits their size. You're getting your dwarfing thing on. First PruningAfter planting, make a heading cut at an angle just above a leaf node so that the whip now stands knee-high or no taller than 18 inches from the ground. While lopping off the top two-thirds of your new sapling seems like something a lunatic would do, do it anyway—the future structure of your tree depends on it. A knee-high prune is reasonable for almost all fruit trees for small gardens. Your beautiful sapling that you picked from the nursery will now be a knee-high stick. That is a bit shocking for me. This initial cut creates a sturdy, low-branching scaffold, the major supporting limbs of the tree. Where you cut becomes the crotch of the tree, and the trunk will grow no taller. This heading cut and the pruning that follows creates branches strong enough to support the weight of ripening produce. The compact structure of the tree to come will begin to develop as a consequence. Heading your tree while it’s still dormant will take advantage of nutrients stored in the roots, and vigorous growth and branching will occur in spring, when the plant directs its energy to the remaining buds — the perfect combination of conditions to get a small fruit tree off to a strong start. Your initial cut will awaken the buds below, and they will eventually develop into new limbs, each with a growing tip of its own. The resulting open-center tree will be shorter, stronger, easier to care for, and far more fruitful. Heading Cut
Used to shorten branches and limbs. Make a clean cut just above a leaf node or where a leaf is attached to a stem. This type of cut forces the buds below to grow into new branches, increasing bushiness. If you've sheared a hedge, you've seen the resulting bushy growth of heading cuts. Thinning CutRemoves an entire branch or shoot in two steps. The first cut
shortens the branch to a stub and avoids ripping the bark. The second cut removes the rest of the limb; cut back to just above the branch collar, the
thickened area of bark from which a limb emerges. Thinning cuts decrease the
number of branches and open the interior of the tree to light and air. Light is
crucial for the formation of fruiting spurs, the twigs that blossom and
ultimately bear fruit. Pruning Schedule
Late winter is an ideal time to prune for structure and
aesthetics, but not for controlling height: Branches grow vigorously in spring.
To keep your tree small and sturdy, prune in June, around the summer solstice.
By removing leafy growth then, your tree is put on a diet; fewer leaves
means less photosynthesis, which decreases the amount of food made by the plant.
Reducing available nutrients and energy, along with summer pruning, helps your
tree stay short. Pruning Schedule: Step 1: First SpringIf your tree doesn't already have branches below the initial
heading cut, use your fingers to remove all but three evenly spaced buds. These
will become the tree's scaffold branches. Remove suckers—growth that emerges from the rootstock—and prune away all but the three branches evenly spaced around the trunk. Head back these branches by one-half to two-thirds, to an outward-facing bud. Pruning Schedule: Step 3: First Winter Prune to open up the center of the tree and remove crossing or crowded limbs. These cuts encourage a vase-like shape. To spur growth of thinner limbs, head back by two-thirds; to slow growth of thicker limbs, head back by one-half. Pruning Schedule: Step 4: Second SummerYou'll have a small, shapely tree that still has growing to do.
Head back vertical branches by one-half to two-thirds. These cuts reduce height
and encourage branches to grow at a 45° angle, horizontal enough to create
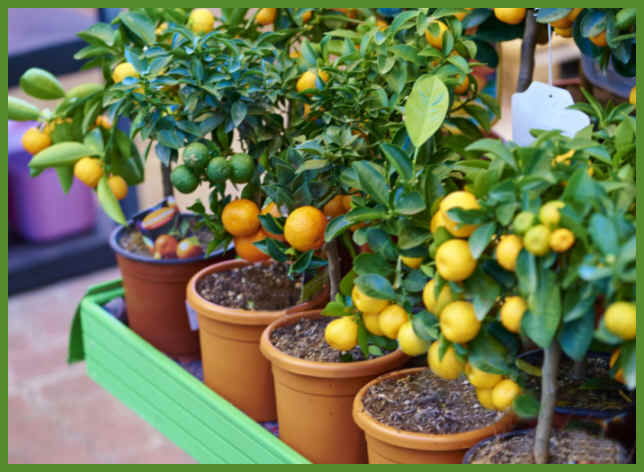
fruit. In winter, prune to refine the tree's shape and maintain its form. The final size now depends solely on summer pruning: Thin crowded branches and head back growth that exceeds your reach. Fruit on the tree? Prune anyway. Skinny Your Trees - To learn how to espalier (flatten and train) your fruit and ornamental trees against a fence, wall or structure, for more fruit in a lot less space, check out this how-to. The Best Fruit Trees To Grow In Pots Once you’ve decided what plant you want to grow, it’s time to choose a container. First, plan on a very large pot for a mature fruit tree since it may expand to four to six feet tall. And if you’re going to move pots indoors in the winter, put them on casters to make heavy containers easy to transport. Some fruit trees, such as cherries, apricots, and peaches, are self-fertile, so you will get fruit with only one tree. Others, such as apples and pears, need a partner nearby to ensure pollination. If you have room for only one apple or pear tree, a "family" or "fruit cocktail" tree, in which three or 4 varieties have been grafted onto one rootstock, is ideal. Some of the most popular Dwarf trees to grow in containers are: Meyer lemon: First imported from China in 1908, it is believed to be a cross between a lemon and a mandarin orange. The fruit has a very sweet flavor and is less acidic than a true lemon. Calamondin: Prized for its attractive shape and foliage. It is grown primarily for aesthetics and less for actual, edible fruit. Calamondin orange is a great choice for beginner gardeners. These glossy trees constantly produce intensely scented flowers, which develop into small, round fruits that are too sour to eat raw, but make delicious, tangy marmalade. They can also be cut into segments and added to cool drinks. The biggest benefit of Calamondin oranges (X Citrofortunella microcarpa), though, is that this is the only citrus that can be overwintered indoors. It can even be grown all year inside. Dwarf Keffir, Key, and Persian Lime Dwarf Honeycrisp Apple Dwarf Lapins Cherry - Modern cherries are self-fertile, so you only need one tree to ensure a good crop — if you can keep the birds off. Netting may be a necessary defense. Expect beautiful blossom and lots of fruit when the tree is established. Grow cherries as a bush on a rootstock or as a fan against a warm wall. Dwarf Plums Favorite Trees to Grow in Pots
Always check with suppliers to see if you need more than one tree to ensure good pollination. Some fruit trees, such as cherries, apricots, and peaches, are self-fertile, so you will get fruit with only one tree. Others, such as apples and pears, need a partner nearby to ensure pollination. If you have room for only one apple or pear tree, a "family" tree, in which three varieties have been grafted onto one rootstock, is ideal. How to Plant and Grow Fruit TreesYou can grow fruit trees in pots at least 1 foot in diameter and 1 foot deep. Galvanized pails and buckets come in the ideal size, look surprisingly elegant, and cost fairly little at hardware stores. Heavier options include halved wooden barrels or terracotta pots, while for super-lightweight versions consider plastic planters. You will also need to anchor the tree to some type of support, as a fruit tree in full leaf can really catch the wind. Feed potted fruit trees every two weeks from blossom time to mid-autumn with a feed such as liquid seaweed and keep them well watered. It's a good idea to mulch the surface of the soil to keep moisture in. The traditional time to plant fruit trees is in the dormant season from mid-fall to early spring, though you can pick up potted trees all year round. The pruning required varies depending on the form and type of fruit tree. Mail order your bare-root trees. Inspect the tree when it arrives to be sure the packing material is still moist and the roots are in good shape. As with any bare-root tree, make sure the roots never dry out before planting. To plant:
Sources: |

Quick Links
Content, graphics and design ©2021 marysbloomers.com