|
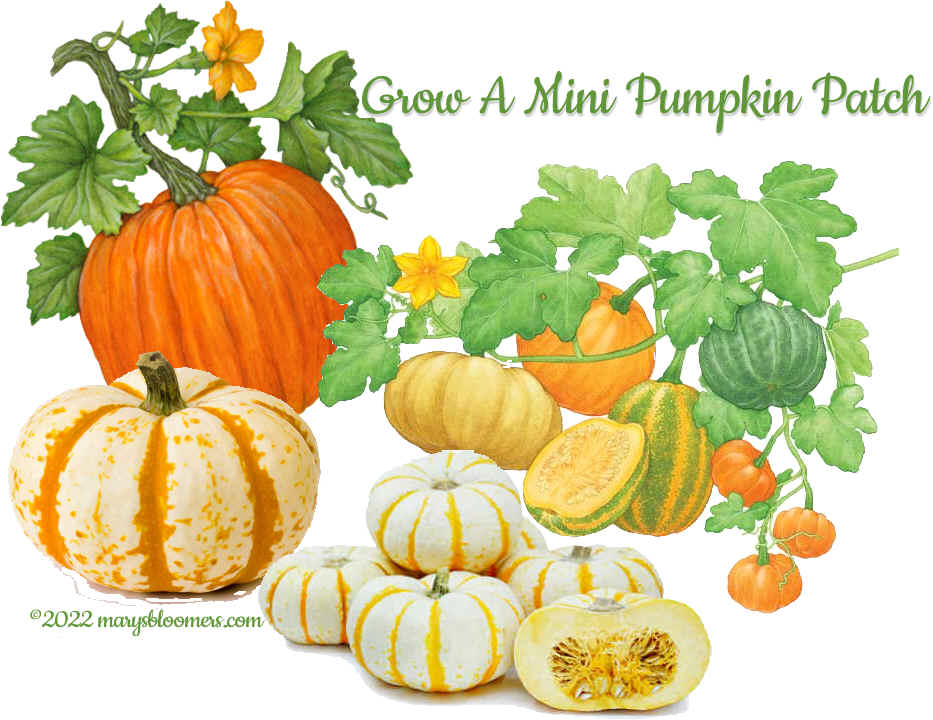
Growing Compact Baby
and Mini Pumpkins In A Small Space
-
Grow these little cuties in the ground, in big pots or elevated raised beds if
your space is limited.
Perfect for patios, balconies, terraces and courtyard gardens.
Good varieties of little
pumpkins include Jack Be Little, Wee B. Little, and the white Baby Boo,
Mini Casperita, and others.
These mini pumpkins are ideal for small gardens and they can be grown vertically
on a trellis or up a fence.
Plant
them in the spring, as soon as
the threat of frost has passed. Most people prefer to sow pumpkin seeds directly
into the garden, but you can start them indoors 2-3 weeks before your last frost
date. Most varieties will mature in an average of 95 days, some a little less.
Mini-pumpkins should be grown
in full sunlight. Pumpkin plants are heavy feeders and
they need plenty of fertilizer. Mix liberal amounts of compost or manure into
your soil before planting your pumpkin seeds. This applies to regular pumpkins,
gourds and squash, too.
Pumpkins in Pots
Mini pumpkins grow quite a bit
smaller than other pumpkins, the sugars will be compacted and the flesh will be
sweeter.
These little pumpkins can be
grown in elevated raised beds, and large containers next to a fence or trellis
they can use to climb. Try growing mini pumpkins up a fence by
tying the little vines once they get long enough and seem to be getting tendrils
seeking a surface. You can let the vines spill over the sides of a
container and onto the ground. You can grow miniature pumpkins
in almost no space at all. You can even try growing them in 5 gallon buckets
you'll find at home centers. or you can grow them in a half wine barrel on your
porch or patio.
You can hollow out some
varieties and use them as little bowls for snacks, dips, applesauce or
condiments for your fall harvest table.
Suggested Types To Grow
In Your Garden
This year, I am trying White
Mini Casperitas in pots.
Wee Be Little
120 days. These little Pumpkins weigh in at one half to one pound. Wee Be Little
is produced on a bush, taking up less space than the big, rambling types. Eight
feet is enough to grow loads of little Pumpkins, perfect for carving. The flesh
is thick, tasty and sweet, making Wee Be Little great for Pumpkin muffins,
breads or pies, and they store especially well. Ideal for small gardens and you
can plant them in large containers.
Mini Tiger Striped
Pumpkins
These can be mottled green, orange or white
with vertical stripes. Mini Tiger pumpkins are 3-5 inches in diameter,
tender and smooth, with a sweet and slightly nutty taste.
Small Sugar Pumpkins
These are a small pumpkin variety reaching
about 7 inches in diameter. They’re commonly used to make pumpkin pies.
Mini Casperita
A small white, attractive pumpkin variety that is great for Halloween
decorations. They also have a delicious taste which is similar to acorn squash.
Like most of these small pumpkin varieties they grow to about 3 to 5 inches in
diameter, and 2 to 3 inches high. Harvest in about 80 days.
Jack Be Little and Jill Be Little
The most popular and well-known small
pumpkin varieties. They have a flattened, ribbed shape and will easily fit in
the palm of your hand.
These little pumpkins have a long shelf life, and they look great as part of a
table decoration. They measure about 3 inches in diameter and 2 inches high
Baby Boo
A small white pumpkin that can be eaten or
just be decorative. Each plant will produce about 10 small pumpkins and the
color isn’t affected by sun or frost. Bush is about 24 inches tall, and can
vine out 15 feet. These can be grown on a trellis.
Hooligan
A cute, tiny pumpkin with an orange and white mottled appearance. They’re one
of the most attractive small pumpkins for Halloween or fall decorations, and
they grow on compact vines.
Gooligan is a cute white Pumpkin that is ideal for decorating and you can
paint them. They grow to about 6 inches in diameter, so they’re small enough
to grow on a trellis.
Kabocha
Look like a little green pumpkin, but they’re really a type of squash. They
have a sweet flavor.
Bumpkins
Bright orange little pumpkins with strong
green handles. The plant is a semi-bush shape, can be grown on trellises,
and it’s resistant to powdery mildew.
|
Growing and Caring for
Potted Pumpkins
Choose 5-10 gallon containers. I like to use
the Home Depot 5 gallon buckets, or plant 3 vines in a 2x4 ft. elevated raised
garden bed. You can purchase 5 gallon food safe white pails, too.
Wait until temperatures are warm and plant
three seeds 1 inch deep. Water the container. For quicker germination,
put seeds wrapped in a moist paper towel in a plastic bag and set in a warm
place indoors. Once you see the sprout, plant it immediately. Place the
container where the plant will receive full sun.
When all the seeds have sprouted, thin to
just one or two vines per pot for best results.
Fertilize and keep the plants moist by
watering from under the leaves so powdery mildew doesn’t form. Water deeply and
frequently. In my experience with squash and pumpkins, powdery mildew is a very
stubborn and persistent threat. Nothing I have done prevents it. I treat it
at the first of infection, and keep it in a sunny and airy place. I use
Neem Oil as a fungicide in the spring, and again during the season if I spot the mildew. You can spray all summer and into fall to protect your
trees and landscape. It is natural and not harmful to you, your plants,
or your pets.
Harvest your wee little pumpkins when the
vines begin to die back.
"Curing"
allows the pumpkins to last longer by hardening their skin, and they will store
longer.
To cure your little pumpkins, cut them off the vine and let them sit in a sunny,
dry place in your garden, on your patio, or your doorstep.
Keep them there for at least 2 weeks to thoroughly cure. Meanwhile, they'll look
very pretty decorating your backyard.
I use Neem Oil as a natural fungicide/pesticide and
Diamataceous Earth for pest problems in every part of my gardens. can be applied at intervals to protect the
plants, from spring until fall.
Alternaria Leaf Spot: Small,
round reddish brown spots with white to gray centers form on the upper surface
of the leaves and along the mid-rib. The lesions may encircle the stems and
cause wilt. This disease is worse in warm, wet or very humid weather. Burpee
Recommends: Avoid getting water on the foliage. Remove infected plant parts
and do not work around wet plants. Provide plenty of air circulation. Contact
your Cooperative Extension Service for fungicide recommendations.
Anthracnose: This is a
fungus disease that attacks the fruit as it is ripening. The first visible
sign is a circular spot on the skin that is slightly sunken. The spots enlarge
and turn black; the fruit rots. Extended periods of heat and humidity
facilitate anthracnose growth. The fungus overwinters in diseased plant
debris.
Burpee Recommends: Plant resistant varieties, provide
sufficient space between plants for good air circulation, avoid overhead
watering which can spread the fungus spores, keep a clean garden, remove and
discard all diseased plant material and rotate crops. Use a mulch to prevent
spores from splashing from the soil onto plants.
Bacterial Leaf Spot: First
signs are small translucent spots with a broad yellowish edge that slowly
enlarge and become angular or irregularly circular with a reddish center. It
thrives in cooler temperatures.
Burpee Recommends: Remove infected
plants. Rotate crops with plants in a different family. Avoid overhead
watering. Do not work around plants when they are wet.
Downy Mildew: This fungus
causes whitish gray patches on the undersides and eventually both sides of the
leaves.
Burpee Recommends: Rotate crops with plants in a different
family. Avoid overhead watering. Provide adequate air circulation, do not
overcrowd plants. Do not work around plants when they are wet.
Powdery Mildew: This
fungus disease occurs on the top of the leaves in humid weather conditions.
The leaves appear to have a whitish or greyish surface and may curl. I
am plagued by it on many of my plants every year. Neem oil controls it well.
Burpee
Recommends: Avoid powdery mildew by providing good air circulation for the
plants by good spacing and pruning. Contact your Cooperative Extension Service
for fungicide recommendations.
Common Pest Problems
Aphids: Greenish, red,
black or peach colored sucking insects can spread disease as they feed on the
undersides of leaves. They leave a sticky residue on foliage that attracts
ants.
Burpee Recommends: Introduce or attract natural predators
into your garden such as lady beetles and wasps who feed on aphids. You can
also wash them off with a strong spray, or use an insecticidal soap.
Blossom End Rot (BER): Blossom
End Rot causes large brown or black dry or sunken spot(s) to appear, usually
starting at the blossom end (opposite the stem) of the fruit. Fruits often
ripen prematurely. BER occurs when a plant cannot metabolize the calcium it
needs to develop properly. This can occur when there is not enough calcium in
the soil or when root damage and water stress reduce the uptake and movement
of calcium through a plant. Occasionally, BER is the result of excessive
nitrogen fertilization. It only takes a day for a lack of calcium to affect
fruit, and that day can occur any time after blossom set.
- Once a fruit has BER it will not
recover. The plant is still healthy, just remove the affected fruit from
the plant.
The fruit is still good to eat if you remove the affected part.
- BER most frequently occurs on fruit
produced earlier and later in the season, as this is when natural
fluctuations in precipitation and cold weather occur.
- To avoid BER, properly site and prepare
your garden bed before planting. Most crops need full sun and loose,
well-drained organic soil. Make sure soil pH is slightly acidic, between
6.2 to 6.8, for optimum nutrient uptake. Test your soil to see if calcium
is recommended. If it is, apply lime in the recommended quantity according
to manufacturer's instructions.
- Avoid planting too early in cool soils,
as this can inhibit early root development, making the plant more
susceptible to BER. Start with a quality transplant: a healthy seedling
with strong roots will make a healthy plant.
- Avoid wide fluctuations in soil
moisture by applying 2-3 inches of mulch. This will moderate the release
of water to plant roots, and also keep the soil from drying out when it is
directly exposed to the sun.
- Avoid drought stress by making sure
your plants get at least 2 inches of rain or water per week. Apply enough
water to moisten more than the top inch of soil. Container grown plants
will need more than 2 inches of applied-water per week in hot weather,
check them daily if possible. Consider using drip irrigation or soaker
hoses. One or two soakings are better than many light waterings.
- Avoid over-fertilizing during the early
fruiting stage, especially if the fertilizer contains high percentages of
nitrogen.
- Avoid close cultivation around the base
of plants when weeding. A layer of mulch should help prevent the possible
disturbance or damage of fragile roots accidentally.
Cucumber Beetles: Beetles
may be spotted, striped or banded and can be very harmful. Beetles are usually
¼ to ½ inch in size. Beetles start feeding as soon as they hatch and can
kill or slow the growth of the plants. Beetle larva can bore through the roots
of the plants. Beetles can also transmit diseases from plant to plant. Knock off adults into a jar of soapy water and destroy them. Spade
the soil to destroy dormant beetles before you plant. Use a row cover to
prevent adults from feeding on young plants. Consult your Cooperative
Extension Service for other insecticide recommendations.
Spider Mites: These tiny
spider-like pests are about the size of a grain of pepper. They may be red,
black, brown or yellow. They suck on the plant juices removing chlorophyll and
injecting toxins which cause white dots on the foliage. There is often webbing
visible on the plant. They cause the foliage to turn yellow and become dry and
stippled. They multiply quickly and thrive in dry conditions.
Burpee
Recommends: Spider mites may be controlled with a forceful spray every other
day. Try hot pepper wax or insecticidal soap. Check with your Cooperative
Extension Service for miticide recommendations.
Squash Vine Borer: The
brown headed larva will bore into stems, feed through the center of the stems,
block the flow of water and the plants will collapse and die. The first sign
of this pest is that the plant will wilt during the day and perk up at night.
Check the base of the plant for holes and you will see what looks like
sawdust.
Burpee Recommends: Pull and destroy any plants killed by
squash vine borers. Row covers will prevent the female from laying her eggs.
Although you can’t always save the plant, as soon as you see the wilting
plant, cut a slit in the stem above the hole using a sharp, sterilized knife. Kill the
borer with the tip of the knife, or pull it out. Mound soil over the cut area
and keep the soil moist. New roots may grow and the plant may live. Rotate
crops. Consult your Cooperative Extension Service for insecticide
recommendations.
Recipe
Baby Punkin Breakfast
Bowls
4 mini pumpkins, about 1 pound each, with
fairly even bottoms
4 ounces diced pancetta, chopped cooked
bacon, or italian sausage
5 large eggs
4 pieces dry, day-old Italian or artisan bread, cut into cubes
1 tablespoon minced fresh sage, or 1
teaspoon dried
1 tablespoon minced Italian flatleaf
parsley
1/2 teaspoon salt
1/2 teaspoon freshly ground pepper
1 tablespoon finely chopped red onion
1 tablespoon finely chopped, fresh garlic
Italian grated cheese of your choice.
Preheat the oven to 375 degrees
and line a baking sheet with parchment paper.
Slice the top quarter off each little pumpkin and remove the seeds
and stringy things.
Save the seeds for drying, seasoning, and roasting later.
In a medium skillet over
medium-high heat, sauté the meat with the onion, until cooked
through. Add garlic and saute another minute. Don't let the garlic
burn. Drain the fat.
Whisk one of the eggs, and toss
it in a large bowl with the meat, bread cubes, sage, parsley, salt,
pepper, garlic, and onion until well combined.
Fill each pumpkin with the
stuffing mixture to a little less than 1 inch from the top, and place
it on the prepared sheet.
Bake for 40 minutes, or until the pumpkins have softened.
Remove the pan from the oven and use a spoon to lightly compress the
stuffing.
Pour 1 of the remaining 4 eggs into each pumpkin.
Lightly cover the pumpkins with a sheet of foil.
Increase the heat to 400 degrees and return the baking sheet to the
oven.
Bake for another 10 minutes, until the eggs are just set.
Serve hot, topped with cheese, if desired.
Variation: Use your thanksgiving
turkey leftovers and stuffing. Bake the filled pumpkins. Serve with
cranberry sauce or gravy on top. Or use a sweet stuffing and drizzle
syrup, or sprinkle brown sugar on top.
©2020 Mary Hyland
Sources:
Burpee Seed and Nursery Co.
University of Minnesota Extension
Graphics created from images
found in the public domain
Growing
Baby Melons
in a Small Space Storing Your Harvests
Native
American 3 Sisters Gardens
Design, graphics,
articles and
photos ©2008+ marysbloomers.com™
All rights reserved.
|
|